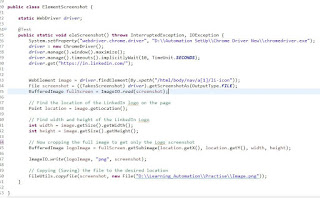
getScreenshotAs for WebElement was not supported until Selenium 3.x, so we had to take a long route like taking a complete viewable area screenshot and then cropping the part where we have our element by using getLocation, getSize, getWidth, getHeight and then finally getSubimage method like shown in image 1.
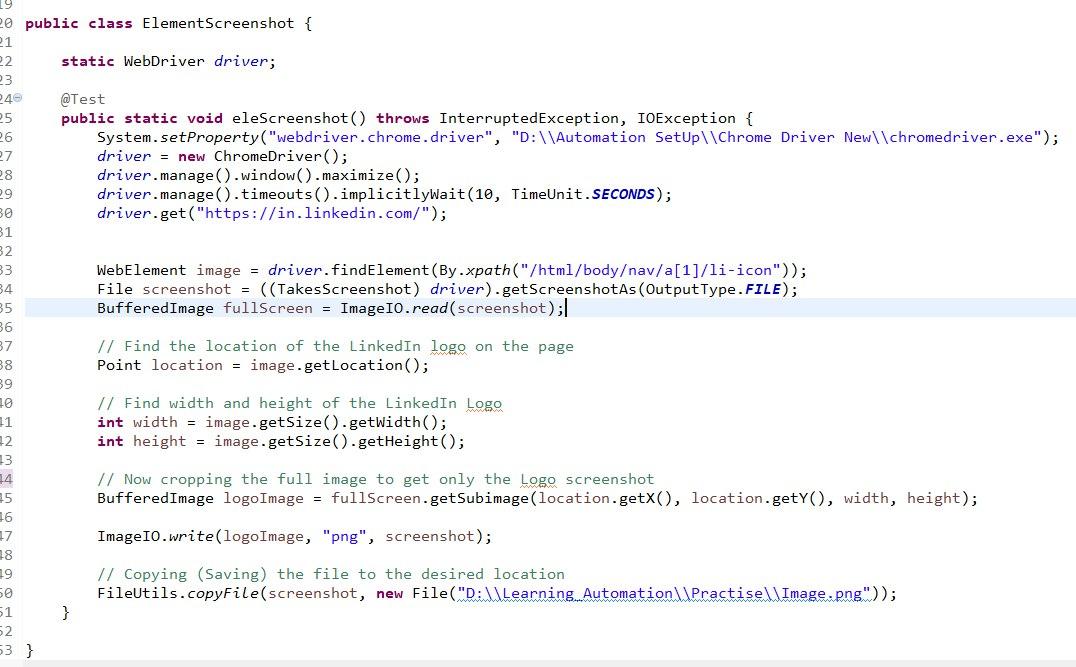
But from Selenium 4 (at least alpha 3) onwards, getScreenshotAs is also supported for WebElement like this:
public static void eleScreenshot() throws InterruptedException, IOException {
WebDriverManager.chromedriver().setup();
driver = new ChromeDriver();
driver.manage().window().maximize();
driver.manage().timeouts().implicitlyWait(10, TimeUnit.SECONDS);
driver.get("https://in.linkedin.com/");
if(driver instanceof ChromeDriver)
{
File src = driver.findElement(By.xpath("/html/body/nav/a[1]/li-icon")).getScreenshotAs(OutputType.FILE);
FileHandler.copy(src, new File("D:\\Learning_Automation\\Practise\\Image1.png"));
}
}
Note* I used instanceof method as I was getting some other driver incompatibility error but it should work without even instanceof method.
seleniumautomation selenium4 screenshot automationtesting testing


Comments
Post a Comment